Have you ever wanted to reduce the noise coming from outside or the next room over into your bedroom, office or studio? Specific techniques and products can help you reduce the noise in a room. If you truly want a room to be soundproofed and have no disturbance from the outside world, you may need to explore more complicated methods. Building a separate, isolated room inside of the original room is one of the best ways to isolate sound and prevent it from transmitting through the walls. In this article, we’ll guide you through how to build a room within a room that offers near-complete soundproofing.
Common Reasons to Soundproof a Room Within a Room
Before you begin soundproofing a room, evaluate why you would like to soundproof the room. Consider the purpose of the room. Is it going to serve as an office space? A recording studio? A study room?
The most common reasons to soundproof a room involve keeping sound from getting in and preventing sound from leaving the space. For example, in a recording studio, it is essential to keep external sounds from reaching your microphones and equally important to keep loud music from reaching others’ ears — especially if you’re operating in an area with close neighbors.
Common reasons to soundproof a room are enhancing privacy, improving home comfort, increasing concentration and preventing sound from escaping or entering a room.
How to Soundproof a Room Within a Room
Now that you’ve identified the purpose of the space that you want to soundproof, let’s determine the best way to soundproof your room within a room. We’re here to help you achieve high-quality, professional soundproofing results. To construct a soundproof room within an existing room, follow these steps:
1. Decouple the Walls
The first step to build a room in a room is to decouple the walls. The decoupling process uses different types of dense materials to keep sound vibrations from making contact.
Decoupling the walls can be done in several ways. The best and most effective way is to have a double wall system which would require you to build a second wall with standard two-by-four lumber and steel studs. This wall should be built a few inches away from the original foundational wall. The deeper the wall, the better. A deeper wall offers maximum insulation and creates a greater volume of air, which can help isolate low frequencies better.
Another way to decouple is to make changes to the ceiling framing. Because the ceiling frame is usually in contact with the living space above it, that makes it a little more challenging to install. Combining several decoupling methods will let you take advantage of the pros of each type so you have a more resilient and reliable soundproofing result.
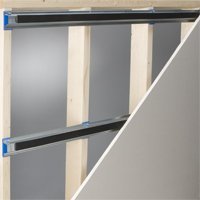
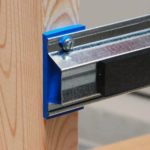
You can also use the isoTRAX® sound isolation system to decouple walls and ceilings. This kit contains everything you need to eliminate vibrations and help reduce the sound transmitted through the walls in your construction.
2. Add a Floating Ceiling
After you have built a second wall, the next step is to install a floating ceiling. This step completes the decoupling process by lowering the ceiling and further soundproofing the space.
There are various methods you can use to float a ceiling. One solution involves weaving new ceiling joists in between the original joists. Position these new joists about 1-2 inches lower than the existing ceiling. Adding these joists aids in isolating the room and in blocking out certain frequencies. While this method doesn’t work as well in spaces that have a lot of plumbing and ductwork, it does offer a complete solution.
A ceiling can also be floated by using soundproofing clips and hat channel. With this method, you’ll lose minimal ceiling height. Overall, you will find that it is a versatile option that can be installed on any joist system
3. Insulate
One of the most old-school yet effective ways to minimize noise when building a soundproof room is to use insulation. While the pink insulation you usually think of does not provide as much sound attenuation as other methods, it can be a great soundproofing asset when installed correctly and in conjunction with other sound absorption techniques.
A common mistake that people make when installing insulation is to install too much material. If you add too much insulation, you can over-compress the space, making the air in the soundproofed room too dry. Note that you don’t need to fill the entire cavity or add extremely thick layers of material in order to effectively absorb sound.
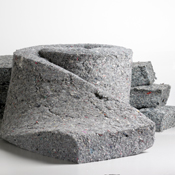
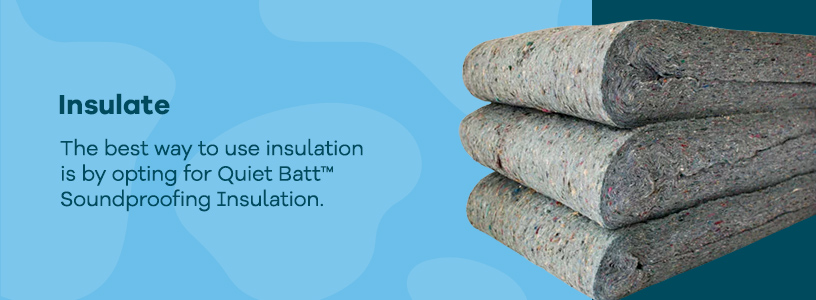
The best way to use insulation is by opting for Quiet Batt® Soundproofing Insulation, which offers superior soundproofing over traditional insulation. Quiet Batt® features closely packed cotton fibers and offers a tight friction fit, which provides enough soundproofing to be used as a stand-alone sound absorption product if desired. With our insulation solution, you can ensure that your space is soundproofed while still allowing for ventilation and balanced air quality.
4. Install Drywall
One of the final steps to soundproofing a room within a room is to install drywall on the newly built decoupled walls and floating ceiling. Adding drywall aids in sound isolation by adding mass to the construction, and more massive objects carry fewer sound waves. Drywall is particularly effective in a decoupled system.
To add the most mass, go with the thickest and heaviest drywall that you can! Having at least two sheets of drywall is ideal, but the best thickness for your situation will depend on various factors. Begin with a base layer of plywood, and then add a heavy ⅝-inch sheet of drywall over the plywood. This will increase the mass. For the ceiling, consider using up to three drywall sheets as ceilings can be the trickiest portion of the room within a room to soundproof.
5. Fill in Air Gaps
To ensure sound has no source of entry or exit, look for any holes or cracks that may be in the walls or ceilings of your room. This is usually one of the last steps when building a soundproof room. If you spot any cracks, you will want to fill those in right away to help absorb any sounds that try to enter the space.
The best way to fill holes and gaps is to use foam gaskets or acoustical caulk, such as a sound sealant from the OSI® Pro-Series. Although these air gaps seem tiny, sealing cracks could be the difference between a completely soundproof room and a normal, non-soundproofed space.
6. Choose the Right Door
Without the right design, the door to your room could be the gap in your soundproof perimeter that allows sound to travel in and out as it pleases. A flimsy, thin door allows sound to enter and exit the space with ease. The best-soundproofed space features a solid-core door for the inner room since this door construction blocks more sound waves. Consider a solid wood door for the best effect.
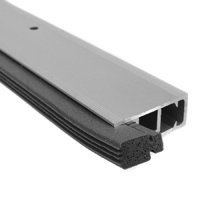
To further enhance soundproofing around the door area, use a door soundproofing kit with a perimeter seal, door sweep and other tools to enhance the soundproofing around the doorway. This kit can improve insulation around the door’s cracks and gaps, enhancing sound absorption.
Why Choose Soundproof Cow?
If you are looking for reliable soundproofing solutions or are in the planning process of building a room within a room, Soundproof Cow has you covered. Because we understand that your soundproofing and acoustic needs are unique, we will work with you to develop a tailored approach. Our solutions-oriented team will help you choose the perfect product or combination of soundproofing elements to keep unwanted sound from entering your space to a minimum.
No matter the size or type of soundproofing project, we are committed to customer satisfaction. We will do what it takes to ensure you are thrilled with the results. With our moola saver products and ongoing No Bull Sale with deep discounts, we make sure you have access to the top brands and products you need — while keeping more cash in your pocket.
Purchase Soundproofing Materials From Soundproof Cow
Building a soundproof room can create the perfect space for a recording studio, private office, personal movie theater or even bedroom. The numerous sonic benefits of a soundproofed room can enhance the usability and practicality of a space, especially if it is essential that no sound enters or exits a room.
With the right setup, planning and construction, a soundproofed room is achievable and worth it. By completing actions such as decoupling the walls, adding a floating ceiling, insulating, installing drywall, choosing the right door, and filling in air gaps, your room can be as close to perfectly soundproof as possible. And of course, you can always consult the experts at Soundproof Cow to get your project mooving in the right direction.
Our experts are here to help you create a space that’s udderly quiet and enjoyable. If you are ready to begin soundproofing your room, purchase your soundproofing materials from Soundproof Cow today!


