-
Is Your Home Recording Studio Working for You?
- For many musicians, the home recording studio is their castle — a sanctuary where they can fully focus on their art. When you have a home recording studio, you control your destiny when it comes to your future in music. You can produce professional demos, record whenever the inspiration strikes you, day or night, and not have to worry about compromising your art. Most beginning musicians don’t think they have the money or space to create a home recording studio. However, the reality is, all you need is a garage or other suitable home space and quality recording studio soundproofing. For that quality studio soundproofing, musical artists in-the-know contact Soundproof Cow.
-
What Are the Benefits of Soundproofing a Music Studio?
- Not only is soundproofing a studio beneficial, but there’s also little point in trying to operate one without adequate studio soundproofing. Music is all about the sound, and the higher sound purity you have, the better chance you have of producing the recording you want — the one that will make others take notice. Quality music studio soundproofing allows you to produce superior, professional sound quality recordings, lets you nail down your recording in fewer takes because of less sound interference, and lets you record as loud and as long as you want without having to worry about disturbing family members or neighbors. You’ll also enjoy fewer distractions from outside the studio pulling your focus from your composition.
-
Choosing Soundproofing Solutions for Studios: Soundproofing vs. Sound Absorption
- You will generally want both soundproofing and sound absorption for your music studio, and when building your studio, it will be helpful for you to understand the differences between the two and the types of products that will help you with both. When you are considering the quality of sound, sound absorption materials are extremely important. These materials absorb sound waves to minimize reverberation, echo and other harsh byproducts of sound. While sound absorption materials do not actually block sound, they will help give you that sound purity you want when trying to create a pristine recording. Recording studio soundproofing products, on the other hand, actually stop sound transfer. When you layer soundproofing material on your studio walls, you prevent sound from escaping or getting in. This is what will allow you to record freely without worrying about disturbing your neighbors and without having to deal with external sounds that may distract you from what you are doing. While it’s unrealistic to expect you will create a completely soundproofed room in a private residence, by installing recording studio soundproofing products to block sound, along with sound absorption products that improve sound, you can create a sound isolation scenario that will allow you to create professional-sounding recordings without the need to pay for a professional studio. Another way to isolate your recording studio is to create air space between walls and reduce the number of contact points between building materials. When construction elements are not physically touching, sound waves weaken and transfer is minimized. If you can only use one type of sound control material, or you’re trying to decide how much of one type of material to use versus another, simply consider your needs in a home studio. If you are in a relatively isolated location and your main concern is getting good sound quality, your focus will be on sound absorption material. If you are getting little interference with your recordings, but are in a crowded residential area where sound blocking is a priority, soundproofing will be the priority. Ideally, of course, you’ll want to have a good amount of both.
-
Where to Install Your Soundproofing Studio
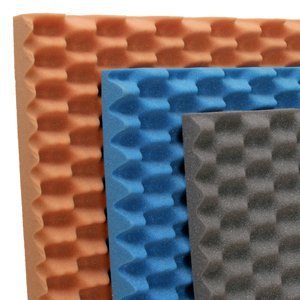
- Before you purchase your Soundproof Cow soundproofing and sound absorption materials, you will want to know which materials work better in which parts of the studio. When determining sound control for your walls, you will want to focus on soundproof barrier insulation. If you can build an air gap between the wall and the drywall you lay down, you will better isolate the sound. We also recommend high-grade acoustic foam . Soundproof Cow offers soundproofing insulation that includes both a soundproof barrier and foam for maximum sound isolation and sound-blocking capability. Floors are not the first area people often think of when considering sound control for a studio, but it can be very important. For hardwood floors, isolators that separate the top layer of flooring with the original layer, perhaps with a rubber intervening material, can serve to effectively deaden floor sounds. If you have a less flexible material, like concrete, you can purchase acoustical carpet underlay to kill sound. For your ceiling, you can build a dropped ceiling and fill it with soundproofing material. You can also hang baffles or acoustic tiles for further ceiling sound control. Once you have the materials you need, creating a studio to serve your purposes should be a quick and highly rewarding process.

Artists spend years perfecting their craft. Their hard work shouldn’t be marred by something as simple as a noisy recording environment. Whether you host singers, musicians, voice actors or anyone else that needs a mic and a sound setup, amateurs and pros alike need soundproofed spaces if they want to sound their best.
Creating these soundproof spaces may be easier than you think. While materials built into the walls are great, there are also plenty of ways to add soundproofing to an existing room. Let’s take a closer look at what soundproofing a recording studio entails.
Recording Studio Soundproofing Products
Recording Studio Sound Absorption Products
Reasons to Soundproof Your Studio
The importance of soundproofing in recording environments is critical. If a car honks outside your window, it can ruin an otherwise perfect song. If your room is more spacious, all the echoes bouncing off the walls can seriously affect the sound quality of your recording.
If you’re considering soundproofing a studio, keep in mind the following traits of effective soundproofing:
- Increases the quality of your recordings: This is perhaps the most significant factor, as it means your recordings won’t pick up a variety of unwanted noises. Even echoes within a room or the sound of equipment can hurt your sound quality and create less desirable results.
- Looks more professional: If your clients visit your studio and it has no methods of soundproofing, they probably assume it doesn’t bode well for their recording quality.
There are two types of sounds that any recording studio has to deal with: sounds from inside the room and sounds from outside the room. A studio-quality soundproofing system should address both. Some materials will block outside sounds — like footsteps from the hallway or a siren wailing by your street — while others will absorb sounds that you create in the studio. These noises include computer fans, airflow from ventilation, clicks on a keyboard and echoes from the sound you’re recording.
Materials used for sound absorption might include porous foam, cotton or fiberglass panels mounted to the wall or ceiling. For sound blocking, materials are usually built into the walls, floors and ceilings. They don’t physically “block” sounds — they substantially minimize them by de-energizing the sound waves with heavy friction between the fibers of the material. You can read more about the principles of soundproofing on our blog.
How to Soundproof Your Studio in 5 Steps
There are several different ways to approach soundproofing a studio, and each method addresses unique types of sounds.
1. Decouple the Structures
Have you ever cranked up a speaker only to have the items on your table start shaking and rattling? Sound waves are made up of vibrations. When these waves travel through two items that are touching, they can compound the issue, particularly in structural components of a room like the materials used to build the walls, floors and ceilings.
Decoupling isolates these points of contact with a material that won’t transfer vibrations. This ensures the sound can’t travel as easily.
2. Use Materials With High Mass and Density
A wall that has more mass and density is less likely to vibrate when it is hit by sound waves. If it’s less likely to vibrate, it’s less likely to transfer those vibrations to the next room over. You can use dense materials during construction to boost a wall’s soundproofing qualities, but you can also add new materials and panels onto a wall that’s already built.
3. Implement Sound Dampening
Damping sounds involves using specialized materials to convert sound waves into heat, which reduces their kinetic energy and limits how far they can travel. Typically, these damping materials go between panels of another substance, like drywall or plywood.
4. Minimize Sound Sources
Every room is filled with sound sources that you likely wouldn’t notice until you go to record. Things like air vents, recording equipment and hard floors can contribute to noisy rooms that hurt your recording quality. Eliminate as many of these extra sound sources as you can.
5. Fill in the Gaps
Another place vibrations can travel is through gaps and cracks in the walls, floor or ceiling. Special types of acoustical caulk for gaps or door sweeps for the space underneath the door can help in this aspect.
Best Music Studio Soundproofing Products
When you’re trying to soundproof a recording studio, you need quality materials that support that goal. We offer several products that lend themselves to recording artists of all types — whether you’re looking to fully outfit a professional studio or just prevent waking up your family when you get inspired at 2 a.m.
Here are some of our products for studio soundproofing.
Floor Joist Isolators
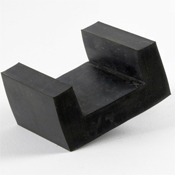
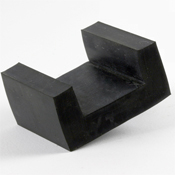
As a form of decoupling, floor joist isolators work to keep structural noise transmission to a minimum. These U-shaped items are made up of medium density thermoplastic and are easy to install. They fit over any wood with a 2-inch width. They are also cost-effective and perfect for professional and in-home studios where impact noises can travel throughout the floors and from adjacent levels of a building. This simple tool is much more effective than it might look.
IsoTRAX®
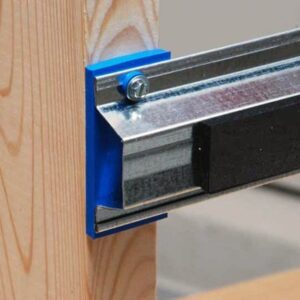
Our isoTRAX® soundproofing system goes inside of the walls during construction and uses a few different methods to minimize sounds. Isolation rails decouple the drywall from its studs, while sound deadening pads reduce vibrations from the sounds. The system is easy to install, works well in a variety of room sizes and addresses multiple types of sound vibrations.
Quiet Barrier®
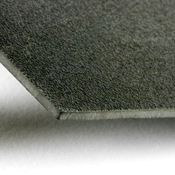
One of our most popular soundproofing products is Quiet Barrier® material sheets. This nonporous, high-density material blocks airborne sound transmission, such as conversations and noises, and dampens vibration sounds, like impacts. It keeps your room quiet from adjacent sources but won’t reduce the sound inside. You can cut Quiet Barrier® foam to the size you need and use it in a variety of locations and applications. It even comes in peel-and-stick options, so you can use it like a thick sticker for easy installation.
Quiet Batt®
One of the most essential home studio soundproofing materials is sound insulation — and you want a high-quality product that will get the job done.
Quiet Batt® soundproofing insulation is the studio soundproofing material you’ve been looking for. It consists of densely packed, nonirritating cotton fibers, not traditional fiberglass insulation. Simply put the soundproofing insulation between the metal or wooden studs in your walls like you would regular insulation. The snug fit absorbs vibrations and soundwaves traveling in or out of your studio, helping to create a sense of sound isolation.
Enjoy better recording quality and stop disturbing your neighbors with the best insulation for your music studio.
Acoustic Panels
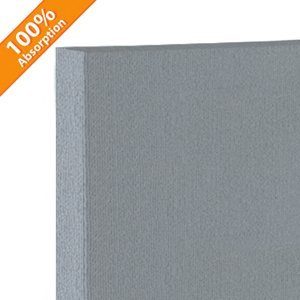
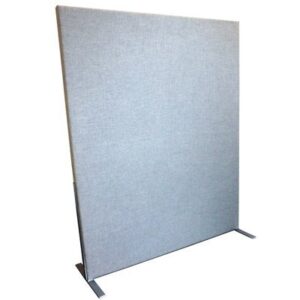
For a more stylish look with sound-deadening and sound-absorption characteristics, acoustic panels are an excellent choice. These materials can help reduce echoes in your recording studio, making for cleaner, clearer sound quality. One of the best parts about acoustic panels is that they are versatile and aesthetically pleasing. We wrap powerful, sound-reducing panels in attractive materials and can even print your choice of images in high-quality, richly colored fabrics. You can hang these panels from the ceiling or on the walls for a professional look.
Door Sweeps and Seals
Every recording studio has an entrance, which can also be an entrance for sound waves. Door sweeps and seals line the doorway with materials that prevent the escape or entrance of these sounds. This solution is easy to install and perfect for home use. It can help you create noise without disturbing others or hearing sounds that disrupt your recordings.
How to Keep Computer Noise Off Your Recordings
In today’s world, it’s normal for people to produce entire albums of music in a single room in their home. That’s possible thanks to the advent of computers and digital audio workstations (DAWs). However, such close proximity to other rooms in your home can lead to issues of unwanted sounds bleeding into your recordings.
Even modern computers can generate a lot of white noise with their spinning fans and electrical hums. For the home studio musician, that can be quite a problem when you record with microphones in close proximity to that noisy computer. Here are some great techniques to help keep computer noise off your recordings:
- Create maximum acoustic separation: Do everything you can to keep your microphones from picking up your computer noise. Record as far as possible from your computer. Try pointing mics away from your computer to reduce bleeding sounds. Use dynamic mics instead of condenser mics whenever possible, as dynamic mics will pick up fewer ambient noises in the room and instead focus on the louder sounds being intentionally recorded. Also, line your recording studio walls with acoustical treatments to keep computer noises from bouncing around.
- Use a laptop stand: If you’re recording on a laptop, you know how they can get warm as their fans kick into a higher gear. A laptop stand can solve that issue by raising it from the table, letting more cool air circulate. A laptop stand will also lessen the sounds vibrating through the computer into the desk below.
- Build an isolating box: An isolating box serves to keep your computer and other studio equipment cool while reducing the amount of noise that escapes it. Try building your own with plywood and acoustic foam to absorb as much computer noise as possible.
- Record in a separate room: If you have the cables, you can record parts of your songs in separate rooms — record vocals in the closet down the hall or rip a guitar solo in your living room for some natural reverb. Either way, you’ll be far from your computer and the noises it produces.
How to Keep Air Conditioning (A/C) Noise Off Your Recordings
Perhaps you’ve had the experience of recording in your home studio in the heat of summer. Though you need to stay cool to stay productive, at the same time, the sound of your air conditioning bleeds into your recordings and reduces the quality of your final product. This experience could leave you wondering how you can keep A/C noise off your recordings.
Here are some tips:
- Seal up the cracks: Sometimes, the A/C isn’t the culprit, and the sound is actually coming from outside. Seal the spaces around your window-mounted A/C unit with pieces of acoustic foam to block outside sounds from coming in.
- Remove the vents: Metal vents can rattle as the air pushes past them. When it comes time to record your next track, try removing them to allow the air to flow without creating any annoying rattling sounds.
- Build a sound dampener: Create a partition in front of your A/C unit to absorb the sound while letting the cool air pass through a small opening. Angle sound absorption hanging baffles or wooden panels with acoustic foam to isolate unwanted noise.
With these techniques, you’ll be on your way to a professionally soundproofed studio!
Find the Recording Studio Soundproofing Products You Need
If you’re ready to take your recordings to the next level with a sound-free room, we can help. Here at Soundproof Cow, we have everything needed to create a custom solution that addresses the noise concerns in your environment.
From door seals to interior design-worthy acoustic paneling, our soundproofing products are perfect for reducing background noise and other sounds that may impede your recordings. Explore our selection of recording studio soundproofing products today — we think it’s a really smart mooove.
Soundproof Other Spaces

I just wanted to let you know that in the end, sealing the air spaces on this door worked just fine and took care of the problem.
I really appreciate you taking so much time to share your expertise with me, and in particular recommending I try the simpler solution before investing in more expensive noise barriers. That is a big credit to you and your business.
- Mike


